Before I start this excursion, I’d like to highlight what some of my goals were. Clearly, my number one goal was to save electricity or rather, not waste electricity when we do not have to have the lights on or the TV or whatever else could have a power switch.
My second goal was to do it in such a way that I would not need to alter anything in the apartment in regards to the electricity or light switches or other things.
My third goal was to experiment (as is often the case when I undertake something).
I had already experimented with the Philips HUE system, in fact half of my apartment is based on Philips HUE but the system was simply not powerful enough and you had to buy into Philips’ ecosystem which I didn’t like because of the high price. I learned that the hard way when I tried to expand it with a smart plug. So I looked for other solutions.
Setup
ZigBee2mqtt
What does that mean? Well, the software package translates from ZigBee device communication to a lightweight IoT messaging queue (mqtt) over TCP/IP. But the ZigBee portion does a lot more - its software can manage a very large catalogue of ZigBee devices, completely manufacturer independent. This is important because it allows you to mix-and-match different ZigBee devices. Take a look at the catalogue here.
Now, it requires that you run two components on Linux: an Mqtt server (I use Mosquito) and the ZigBee2mqtt software that communicates with a ZigBee hub, which is connected via USB to the Linux machine. Which USB hub you can use is really nicely documented as well on the ZigBee2mqtt website. It does require (in my case) firmware flashing but it’s well documented. It also gives you pointers where to order the USB ZigBee hub from.
Because one of my goals was to reduce waste, I installed all this on a Raspberry Pi 4 with very low-power consumption and it’s been working fairly nice.
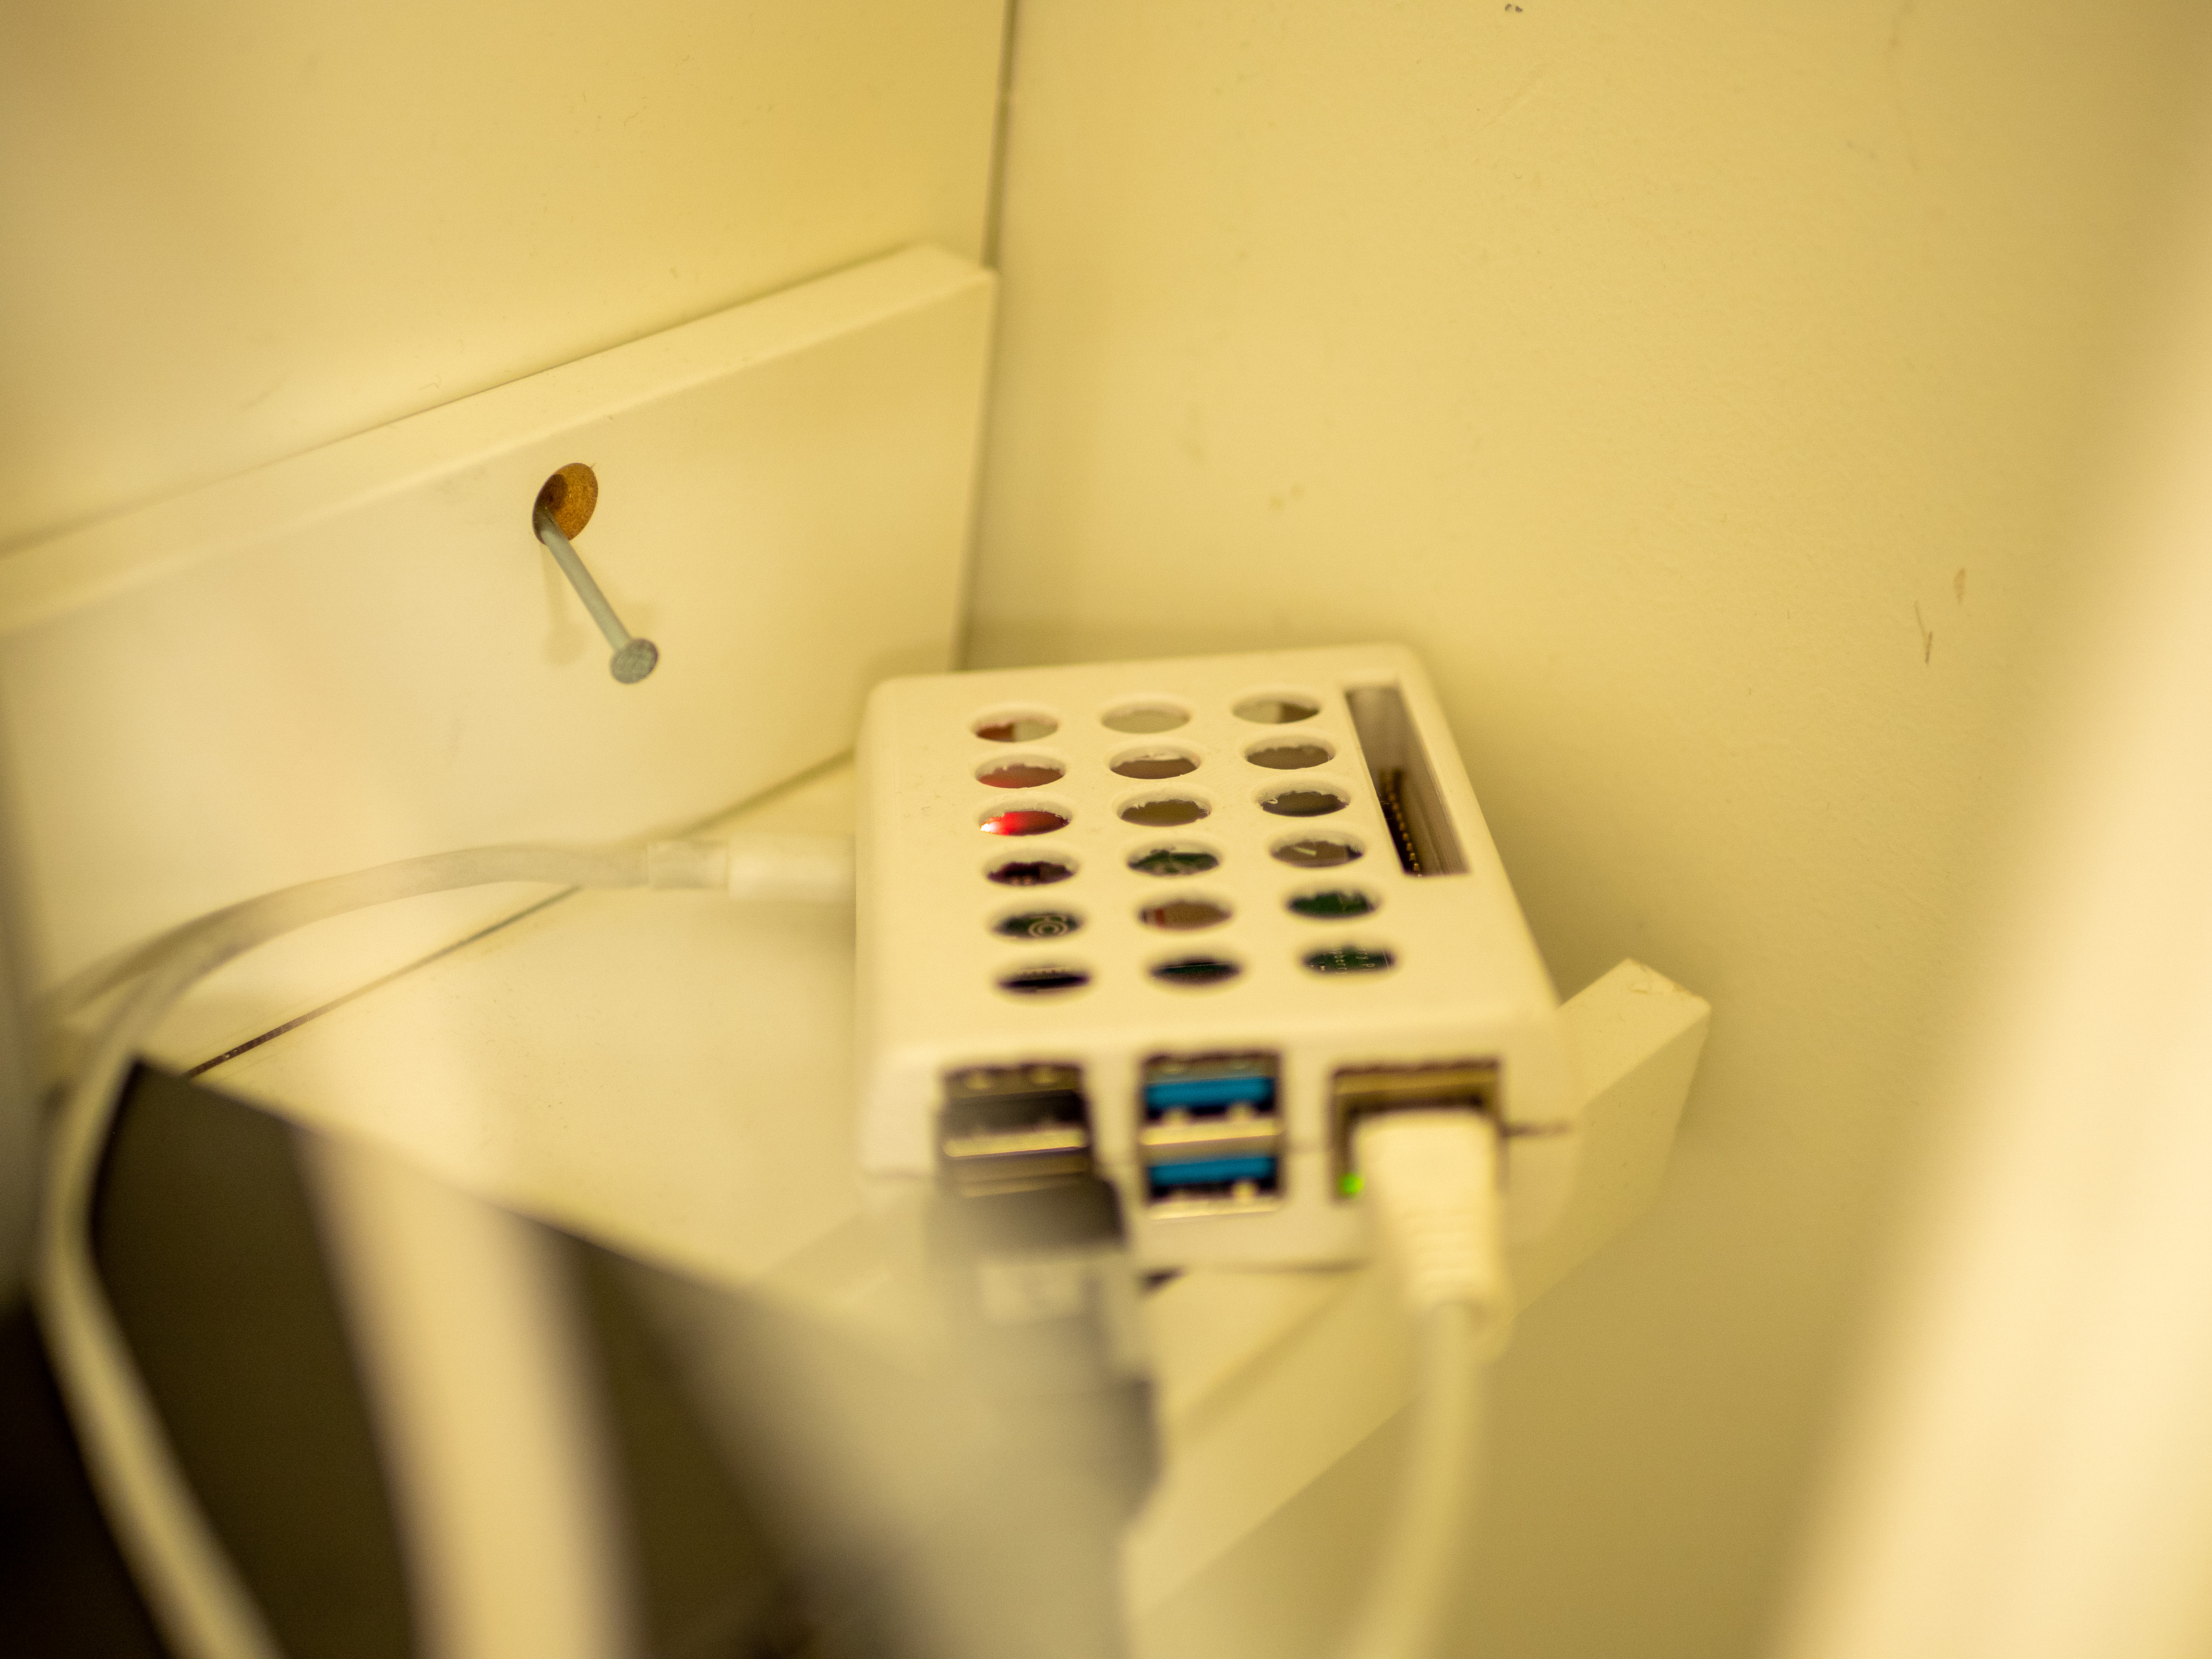 |
| Raspberry Pi running ZigBee2mqtt |
Homeassistant
At this point, I was able to send commands via Mqtt directly to my connected ZigBee devices and that worked really well, but I realised that if I wanted to do something complex and sophisticated, I would have to write the software or scripts myself or I look for a system that would help orchestrate all this.
Enter Homeassistant - you would never know from the name what a powerful tool this is. Homeassistant is exactly the orchestration tool I was looking for to bring all my devices together. But it does a lot more .. a lot. Homeassistant can instantly grab everything you already have on your home network and make it accessible for you to configure. We’re talking your router, your printer, your NAS, your IP cameras, your TV, all your phones and the list goes one. But that’s not enough, Homeassistant also has modules for a lot of different IoT standards. The combination of Homeassistant and ZigBee2Mqtt is _mindblowingly_ powerful and the reason why I could do what I’m showcasing here.
My Homeassistant instance used to run on another Raspberry Pi but because I kept changing configuration constantly, the SD card in the Pi simply gave up at some point. I have moved my Homeassistant to an Odroid system which is still low-power but much more resilient than a Raspberry Pi.
I could write probably another several pages just on how awesome Homeassistant is but I’ll leave that for you to read up on.
 |
| Odroid running Homeassistant |
My first task was to incorporate the existing Philips HUE system into Homeassistant - this works brilliantly because Homeassistant already has implemented all the relevant APIs and so it’s just a matter of finding out the IP address of the HUE’s bridge and connect to it (it does require that you physically press the button on the HUE bridge) - so, now I could control all my Philips devices from a central point. Neat.
What also amazed me was that I could run two different ZigBee networks and they did not interfere too much. My original plan was to disconnect the devices connected to the Philips system and re-connect them to my ZigBee2mqtt setup - but Homeassistant basically saved me that work with a direct integration into the Philips system.
Use case: motion detector
My next step was to start looking for opportunities to save energy - the first one was through a motion detector. So I bought several Xiaomi (also known as Aqara) ZigBee lightbulbs and motion detectors - the motion detectors are very low power that can measure the amount of light and motion and they run off batteries. After connecting them to ZigBee2mqtt and having Homeassistant pick up the new devices (this btw happens automatically), I was able to program the motion detectors in such a way that they would only turn on the lights if there was motion and not enough light. After 2 minutes of no motion, they would turn off again. |
| Aqara motion detector |
Light switches
To prevent the use of the existing light switches, I decided to design and print my own cover - to essentially block access to them. This looks a little bit funky but absolutely works without changing anything in the apartment. Your light switches may look different - these are Swiss standards.
 |
| 3D printed covers for the light switches |
 |
| The covered light switches next to the fancy new Aqara switches |
Non-ZigBee lamps and light fixtures

Use case: The cat alarm
 |
| Camera mounted on board (not wanted to drill into rental apartment walls) |
 |
| Light turns green when cat is detected |
Use case: The connected cat door
Use case: The connected car
 |
| Some Tesla stats; charging state, charging levels, range, temperature, location. energy use, etc. |
Use case: Raspberry Pi Temperature
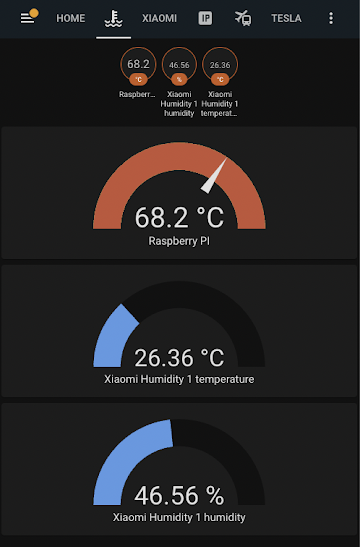 |
| Temperature - there is a correlation between the Raspberry Pi's CPU temperature and the Wash cabinet |
Use case: Public transit information
 |
| Our quick glance dashboard |
Comments
Post a Comment